Pages

Friday, November 10, 2017

GUEST POST!! Catching Christmas Spirit: DIY Cat Toy


Thank you to Natalie McKee over at Leaping Cats for this lovely guest post!!  I am so excited to share with you her handmade creation.  We met through the Ultimate Blog Challenge, one of my best blogging experiences so far.  I hope you like her post!


Catching Christmas Spirit: DIY Cat Toy
By Natalie McKee

Cats are natural predators, but instead of stalking fabric mice or birds, this diy cat toy has them catching Christmas spirit! 

I know, pretty corny -- but really -- if you were looking for an easy Christmas craft, look no further. This “fishing pole” cat toy requires little more than ribbon and yarn, but will bring the magic of the holidays to your feline family members. 

Materials: 

-- Yarn (in one or more festive colors)

-- Ribbon (Christmas patterns are a great choice) 

-- One ¼ Dowel 

-- Pair of Scissors 

-- (Optional): Hot Glue Gun


Instructions: 

First things first, you’re going to want to make your pom poms. There are a number of methods for doing so, but I personally like using either my fingers or a kitchen fork to make the different sizes. The method for creating the pom poms is the same whether you use a fork or your fingers, simply replace the fork tines with two, three (even four!) of your fingers in the steps below. 

Pom Pom Creation: 

Take the end of your yarn and tuck it between two tines in the fork. Next, start wrapping the yarn around the fork over and over until you have a big bunch gathered up. The more yarn you use, the puffier the pom pom (and what’s better than a puffy pom pom?). 


Next, cut the yarn connecting the fork to the spool, and then, cut a piece of yarn that’s about 5 to 6 inches long. You are going to use this piece to tie off the pom pom. 


Now, slide one end of the yarn piece through the tines of the fork and gather it in a loop above the fork. 


Loosely tie that yarn around the yarn bundle, and then carefully slip the yarn bundle off the fork onto a flat working surface. 


Tie the knot very tightly, and double knot. You are creating the “heart” of the pom pom, and if it’s too loose the pieces will fall out once you are finished (I learned this the hard way…). I recommend tying and knotting once, and then doing it twice for good measure. 

Remember: Your cat is going to be batting this to pieces, and you’d like it to last longer than a few hours, ideally. 

Now, it’s time to cut the loops on either side of the center knot with scissors. (Sorry for switching colors on you in the pictures.) 


When you are done, you’ll have something akin to a bad hair day. You’ll need to carefully trim around the pom pom like you’re trimming a shrub to get a round shape. 


Note: The chubbier the yarn you use, the puffier the pom pom. The yarn I chose was definitely on the thinner side, and looked best in smaller pom poms made with the fork, rather than the larger one (pictured above) made by wrapping the yarn around three fingers. 

I made a total of five pom poms, but only ended up using my three favorites for the toy. 


Assembly: 

Next up, I tied a longer piece of yarn to each pom pom and then tied the yarn to the dowel. Double knot, again, for good measure.

You can use a dab of hot glue here to hold the yarn (on the dowel) in place. I offset each pom pom, so they hung at different lengths. You can make them hang as low as you’d like, but the lowest pom pom on mine hangs about 12 or 14 inches from the dowel. 

I then cut the ribbon into 10-inch pieces and tied bows onto the hanging yarn at the top of each pom pom. I cut the excess ribbon ends to keep each bow proportional. 

Tip: Using a lighter (verrrryyyy carefully!), melt the edges of your ribbon to keep it from unfurling. Keep a cup of water nearby, just in case ;) 


Now it’s time for the long ribbon! I simply looped long sections of ribbon (perhaps 2 ft. long? It’s up to you!) over the dowel and then trimmed each piece to a different length like with the pom pom yarn. I used three different ribbons, but you can use more or less as you see fit: 


In order to hide the yarn on the dowel and to keep all the ribbons together, I pushed the knots on the dowel close together and then tied another piece of yarn around all the hanging yarn/ribbon pieces and knotted it, covering the yarn knot with another ribbon knot. 


Finally, I used scissors to curl the pieces of ribbon (not because the cat cares, but because it made it pretty!). 

The finished product? Pretty magical! You could always buy some catnip spray and spritz a little onto each pom pom to make this new toy even more enticing. 

Simply hold it over your cat’s head and see what happens -- it might even distract him from climbing the Christmas tree.


About the Author: 

Natalie McKee rescued her family’s cat, Pumpkin, from living as a stray when he was just a kitten. A decade later she writes at Leaping Cats about ways to keep your indoor cat fit, healthy and happy. 


Do you like what you see?  Leave Natalie a comment here or on her blog to let her know!  


Pin it!


Friday, November 3, 2017

Ingredient Substitutes to the Rescue

Image found here.
You might be trying to save time.  You might be trying to save money.  Or you might be in the middle of a holiday baking frenzy and need a substitute so you can just get on with the recipe!  Besides that, the hallmark of an excellent (and frugal) cook is the ability to work with what you have on hand.   Before you run out to the store, try these substitutes.  You might be surprised at how well they work!


Ingredient Substitutes

1 cup sugar - 3/4 cup honey, 1 cup granulated sucralose, 1 cup granulate stevia such as stevia in the Raw.  In my opinion, baked recipes taste better with sucrolose vs. stevia.  A lot of stevia can leave a bitter aftertaste.


1 cup brown sugar  - 1 cup white sugar plus 1 tablespoon molasses.  Or in a pinch plain old white sugar will do just fine.  It will change the flavor, but not in a way that ruins the recipe.  I have also subbed turbinado (Sugar in the Raw) and that is a great option as well.

1  cup vegetable oil - 1 cup regular (not virgin) olive oil, canola oil or peanut oil or 1 cup applesauce or 1 cup pumpkin or 1 cup prune puree.  I have excellent luck with subbing extra pumpkin in pumpkin bread and leaving out the oil.

1 cup shortening - 1 cup coconut oil (not virgin unless you want a coconut flavor).  I actually prefer coconut oil, the expeller pressed variety, in certain recipes.  There is a chocolate chip cookie recipe my mom made for years with shortening and when I tried it with coconut oil I liked it even better.

1 cup butter - Butter has a signature flavor and fat profile that makes things just so.  Switching this ingredient with substitutes will definitely work, but your end results will just be different.  In chocolate chip cookies you can use coconut oil (I prefer flavorless expeller pressed) or margarine.  In cakes you can even sub in oil.  The end product will be tasty, the texture will just change.  Changing fat for fat usually works just fine.

1 cup buttermilk - 1 cup plain yogurt or 1 cup plain greek yogurt

Evaporated Milk - 3 parts whole milk, 1 part half and half

1 teaspoon vanilla - 1 teaspoon extract of choice (this will change the flavor).  Imitation vanilla extract will also work just fine.  Some rather particular foodies might disagree, but I say it's no big deal.

1 egg - 1 tablespoon flax meal plus 3 tablespoons water. Let sit 5 minutes before using.  This is good in recipes such as quick breads, pancakes, etc.  It will not do when egg is a main ingredient such as in quiche (imagine a flax pie, ick!).  I have had good results with quick breads such as this banana bread.

1 cup white flour - You can try subbing in different flours if you have them on hand.  I prefer unbleached white flour, so I most times sub that in.  You can also sub in whole wheat or white whole wheat quite easily.  Whole wheat flour tends to require more liquid in the recipe, so keep that in mind if you use this as a substitute.  I find great luck doing half white flour and half whole wheat flour without any other changes to the recipe.  It adds some whole grain without anyone really noticing.

Chocolate chips - Chopped chocolate bar, M&Ms

Baking soda/powder - Read this article.  It can be done!

Green onions - Though the recipe won't be exact, any onion will work.  In a pinch you can even use a little onion powder or re-hydrate dried onions.

Chicken - Easily sub in turkey and sometimes even pork.

Ground Beef - Any ground meat such as turkey, chicken or pork will work.  Ground meatless crumbles can also be used.

Cream of anything soup - Follow the recipe on this site or on this site.  You probably have all the ingredients on hand.


Are there any ingredient substitutes you are looking for?  Did I miss anything?  Let me know in the comments below.  And thanks for stopping by!


You might also like:
6 Things To Do With Canned Pumpkin
Helpful Tips on Equal Measures
Buy It, Make It, Maybe


Tuesday, October 31, 2017

I Made it Through the Ultimate Blog Challenge!


Just like that, October is gone!

And I did it!  I made it through the Ultimate Blog Challenge with 31 posts in 31 days.  Yeah!

I thought I might quit for a second there.  With one late post and another just barely squeaked in on time on the 20th I stared to lose hope and ideas!  But then the juices started to flow and I was renewed.  I made it through these 31 days and I'm so pleased!

I didn't think I would use any of the prompts provided by Paul Taubman, but the question and answer idea was the perfect fog-lifter to set me back on track.  You all asked me such great questions.  Thank you for interacting.

Thank you for your feedback yesterday.  I'm going to try one tip that someone suggested.  Tell me in the comments below if you can figure it out!  

It was good to hear that my site is easy to navigate.  I try to make it that way, but I know sometimes what seems easy to one may be difficult to another.

Thank you also for the suggestion to join Wordpress.  I have another blogger friend who really enjoys using that platform.  I am not one who loves change but I will definitely think on it!  I will be starting a new blog this upcoming January, chronicling personal growth.  I will consider WordPress for this even though I've already started prepping in Blogger.

Lastly, I will try to add more content regularly and continue work on things to make this site as user-friendly as possible.

Happy Halloween!


You might also like:
Any Feedback?
10 Fun Facts About Me

Monday, October 30, 2017

Any Feedback?


Now that the Ultimate Blog Challenge is drawing to a close and I won't be sharing a new post quite as often, I am asking you for feedback.  I know there is still one more day to go, but I don't want to forget this important post.  It's been great interacting with you all and many of you have left me comments and questions.  I even wrote a whole post answering some of them.  Thanks for the inspiration!

Looking at the traffic on specific posts, I can guess what people want to see.  But today I am asking what you like most and what you like least. I am asking what you think I could improve and what you think works.

Is my site easy to navigate? On a computer? Tablet? Phone?

Are there any simple changes just staring you in the face?  Have you thought, "why doesn't she just...?"

Be honest.  I'm not asking for a bashing, but in high school I learned an important lesson while working with a friend in an independent study class.  Constructive criticism, while it can sting a little, really helps us to move beyond where we are.  It's one of the most important lessons I took away from school.  I feel like the Ultimate Blog Challenge has really helped me improve.  But your feedback will help even more.

What do you think?  Let me know in the comment section below and THANK YOU so much for contributing.  Blogging is so much more fun with an audience!


Sunday, October 29, 2017

Fall Menu - What We Ate This Week


Sunday - Party food at housewarming party (kielbasa, mac and cheese, taco dip with tortilla chips, veggies and dip, black forest trifle, whoopee pies, and more!)

Monday - Pasta with meat sauce, garlic bread

Tuesday -  Pasta salad, subs

Wednesday - Baked chicken breast seasoned with Goya Adobo, baked beans, green beans, brown rice

Thursday - Baked ziti, salad

Friday - Egg sandwiches

Saturday - Taco Soup - again!  We really like this stuff.  I'm so glad I found the recipe.

I don't have a link to any new recipes this week.  You can click on the taco soup above for that recipe.  It's very good. I use my own taco seasoning in the recipe instead of the packaged kind.  The ranch dressing mix I have never replicated, so I use the pack for that.

What did you eat this week?  Tell me in the comment section below!

You might also like:
Taco Soup
Homemade Taco Seasoning


Saturday, October 28, 2017

31 BLOGtober Post Ideas


Are you participating in a BLOGtober Challenge?  Perhaps you're taking part in the Ultimate Blog Challenge like me.  If so, you might be looking for ideas.  Here are 31 ideas you can use this fall or save for next year!

Are you ready?

31 BLOGtober Post Ideas

1.  A fall dessert recipe - Either create a recipe of your own or review one you've been wanting to try.

2.  A fall craft for kids - Create a tutorial for a children's craft.

3.  A fall craft for anyone - Show your readers something you made and tell them how they can make it too!

4.  A list of to-dos for the upcoming holiday season - Octobers is the perfect time to start getting ready for the holiday season.  Help your readers plan ahead

5.  Trick-or-Treat ideas - With Halloween at the end of the month, help your readers get ideas for trick-or-treaters.  Check out this post.

6.  Costume ideas - Give your readers an idea for a specific costume or generate a list of ideas.

7.  Pumpkin carving idea - Give your readers some ideas!

8.  Pumpkin Painting ideas - Give a tutorial or just display your work.  Check out this post or this one.

9.  Ways to save for Christmas with a savings timeline included - We all know the holidays can cost big time.  Help your readers with a way to save money for the upcoming season.

10.  Thanksgiving menu ideas - Give your readers ideas on delicious Thanksgiving fare so they can come up with a menu before the last minute.  I have a post like this.

11.  Your fall family traditions - Share your family's favorite fall traditions.

12.  A fall supper recipe

13.  A fall snack recipe

14.  Fall decor ideas - Give your readers some tips on decorating for fall

15.  Fall Pinterest ideas - Make a list of things you want to do that you've found on Pinterest.

16.  Fall Pinterest fails - This could be funny if you failed at one of your Pinterest attempts.

17.  Fall recipe magazine review - Get a fall edition of a recipe magazine such as Taste of Home and review it.

18.  Fall craft magazine review - Find the fall edition of your favorite craft magazine and let your readers know what you think.  It might even be fun to find an old version from the 80s and do a review on that!

19.  DIY fall-scented soap - I made some here, but you can make your own recipe and share it with your readers.

20.  Quiz - How Much Do You Know About Pumpkins? -  Generate a quiz for your readers.  This can be a lot of fun!

21.  Favorite Blog Resources - Give your readers ideas on where to get free pictures or anything else you might find useful.  Share the love!  Here's a post I did sharing free photo resources.

22.  Fall Menu - Create either a menu of things you've eaten weekly this fall or generate a menu with ideas for your readers using recipes from your site.  Here's an example.

23.  5 Ideas for Leftover Pumpkins - What are you readers going to do with their leftover pumpkins?  Give them some ideas.

24.  Review of your local apple orchard - I do this here.

25.  Review of your local pumpkin patch - I do this here.

26.  Quiz - How Much Do You Know About Halloween? - another great quiz idea.

27.  Fall Favorites - Make a list of all your fall favorites from pumpkin spice lattes to cozy sweaters.

28.  Reflection on the summer - Use this time to think about the great times you had.  You might even want to create a photo album like I did here.

29.  Recipe Roundup - take all your fall recipes and put them into one post.  Here's one I did with pumpkins and one I did with apples.

30.  Homemade Gift Calendar - Make a calendar so your readers can get ready for the upcoming holidays.  We all know that handmade gifts take time.  Give your readers a timeline they can fill in with a work schedule to help keep them on task with creating their homemade gifts.

31.  Reflect on the season of fall - Check out my post here.  I reflect on the blessing of autumn.

So there you have it!  Next BLOGtober you have no excuse!  And in the meantime, use some of these ideas as the fall season comes to a close.  Your readers will appreciate it I'm sure.


Friday, October 27, 2017

Painted Pumpkins 2017


We visited the pumpkin patch this past Saturday.  And every day, multiple times a day since then my daughter has been asking when we were going to paint our pumpkins.  You see, she just loves to have fun!  And, a week or so ago, I found the best idea on Pinterest for her.  She loves unicorns right now and I saw the cutest little unicorn pumpkin.  When I saw it she had already gone to bed, but I peeked in and saw she was awake and just had to show her.  That unicorn has been on her mind for over a week now and she finally got to make it!


We all had fun.  I went with a simple cartoonish character, my husband found an idea for a kooky vampire on Pinterest and I think my son was inspired by Larry from Veggie Tales because that pumpkin looks awfully familiar!  And lest we forget Teddy, the infamous bear in our house, he too participated in the festivities, painting a honey pot (apropos, right?) on his pumpkin.  LOL!  If you've been around us long enough, you'll know Teddy is a permanent fixture around here.  I'm not sure my son will ever grow tired of him.  I'm not sure I will either!


So now with our pumpkins all decorated we have to figure out costumes for this coming Tuesday.  My daughter's is squared away and I'm guessing you can figure out what she'll be.  Let me know if you can figure it out in the comment section below!  My son's costume is decided but he hasn't started working on it yet.  He wants to be another Minecraft character.  It's going to be Steve this time.  Check out his costume from last year.  If you have kids into Minecraft I know they'll love it.  I think I'll coax him into starting a little sooner this year.


One complication for Halloween around here is that we're trying to avoid or greatly reduce food dyes.  That can be tricky with candy pouring from the sky.  So I'm not going to be too neurotic.  I told the kids they can have whatever they like on Halloween, then I have a plan.  I bought some organic candy without food dye to switch out after the big day.  I bought good stuff too.  It's not healthy by any means, but I think some of us around here don't do so well with food dyes and we're trying again at an experiment we failed at in the past.

I hope you found some inspiration here and Happy Halloween!


You might also like:
Fun Painted Pumpkins
Halloween Trick or Treat Ideas
Homemade Halloween 1980s Style, Baby!


Thursday, October 26, 2017

Free Fall Photos

When I first started my blog back in 2012, I tried to take my own photos for each of the posts.  Sometimes that just wasn't possible, though.  So I looked online to see what there was and realized that I couldn't just copy and paste photos from random sites.  You'd think I'd have known that, right?

After a little research I found out that there were sites with free usable pictures, free even without attribution.  The first site I got many pictures from was Pippalunacy.  They require no attribution, payment, or link back.  They do appreciate any of those things but do not require it.  Click here and you can see their licensing information.


Here is a picture I found from Pippalunacy of some lovely fall pear tree leaves.   All you do to get the picture is download, click and drag.  Of course you can modify it, and sometimes I do.  I have a MacBook Pro and use the download picture preview window to modify the image.  I don't have any special programs, just what my 5-year-old computer came with.  Below you'll see a modified image of the same picture.


I rarely visit Pippalunacy these days, but maybe I ought to.  If I'm not snapping my own pictures for a recipe or craft, I typically head over to Pixabay.  This site has pretty much the same rules as Pippalunacy but there are far more pictures to choose from.  Here is a picture of a nice fall image from Pixabay.


And here is a modified version of it with a link back to the original page.  It's really easy to make a few personal touches to make an image your own.  And with this free site, it's allowed!


Original here.


I would highly recommend these two sites if you need pictures for your blog.  Thank you Pippalunacy and Pixabay for this wonderful service!  When I started using pictures I thought it was too good to be true.  But it's not!  


Do you have a favorite site you use to help with blogging?  Let me know in the comment section below!


As a reminder I'm participating in the Ultimate Blog Challenge.


Wednesday, October 25, 2017

Mom's Meatballs


I'm not what you'd call meatball snob.  I'll eat most any meatball served.  And most meatballs I've had are not bad.  Some have been bad, really bad, but most are decent.  Only three, however, have stood out as top tier meatballs.  One, obviously, is my mom's.  Another is my friend's family recipe.  She won't share it.  It's locked down and buried deep.  So I there's no hope of letting you in on that one!  The other one is a meatball my high school field hockey coach's mom made.  I had it and thought to myself, these are the same as my mom's!  They were an instant winner.

My mom's meatballs are pretty basic.  That's one thing I've learned, though. Your recipes don't need a thousand ingredients to taste good.  Just a few quality ingredients mixed in the right proportions will land you a winner most times.  With all that said, here's the recipe!


Mom's Meatballs

Ingredients

1-1/2 pounds ground beef
1 or 2 cups Italian seasoned breadcrumbs (homemade or store bought)
2 eggs
2 half eggshells full of water
handful of parmesan cheese

Mix all ingredients together, adding enough breadcrumbs to make the mixture firm but not dry.  Start with a cup and go up as needed to get the consistency described.  Form into balls, the size of your choosing.  Broil a few minutes, just until browned.*  This is to drain fat, not fully cook the meatball.  Place browned meatballs in red sauce and simmer about 1 hour.

Meatballs can also be browned in the microwave starting at 3 minutes, then checking for doneness.  Once again, this is to drain fat, not fully cook the meat.

The slow cooker can be used to finish your meatballs in sauce, but I don't advise cooking them longer than 4-5 hours on low.  Any longer than that and you'll end up with over-cooked meat that tastes more like canned fare than delicious cuisine.  You don't want that!

Thanks for stopping by.  And as a reminder I'm participating in the Ultimate Blog Challenge.


You might also like:
Easy Pizza Sauce
Perfect Pizza Crust
Best Ever Rolls

Tuesday, October 24, 2017

Your Questions Answered


Yesterday I asked if you had any questions.  You did!  Today I answer them.  I think I can squeeze most of them in, so let's get started!

Q.  What made me start my blog?

A.  Around the year 2000 I wrote for a page called DyingDays.  It was a site around before blogs were popular.  There were about 10 writers and we shared pieces that gave insight into our lives.  It was mostly spiritual and reflective, but non-religious.  It was a lot of fun.

In 2009 I began my first blog, Just Jill: Thoughts From A Curious Mind.  It's still out there in the ether, ha!  I had a lot on my mind and I really wanted to write about it.  Looking back, that was probably when I started my spiritual seeking.  I lacked discipline, however, and some of the things I wrote about didn't have real insight.  Besides that, there was no real unity of purpose.  It was just whatever came to mind.  I don't regret it, because you have to take a step to start on the journey.  I think that's what that was.

In 2012 I decided to start this blog.  But this time I wanted to do it with purpose.  I picked things that I was good at and enjoyed so that I would keep up with it.  If you look through the timeline on the side, you'll see some dry periods, but I have always come back.  I really enjoy writing and having a clear focus has helped me to continue writing.  I also like to look back.  This blog is a photo album or scrapbook of sorts.

As a sidenote, in between and during all this I attempted a novel and a short story with some other garbage thrown in for good measure.  The blog, however, was immediate and satisfying.

So long story short, I started this blog because I wanted to write.  I write what I write because I like it and there's never a shortage of material.

Q.  Why did I elect to participate in the Ultimate Blog Challenge?

A.  This summer when I challenged myself to write 30 posts in 30 days, I thought there must be some challenge in which to take part.  I scoured the internet and found two that seemed good.  I chose this one because it looked great.  There weren't any crazy rules and it seemed like it would be a lot of fun.  And it is!  Lastly, I was hoping for more traffic.  I got it and it's exciting!

Q.  Do I do my handiwork in social settings?

A.  I bring crochet when I visit friends.  They have grown to expect it.  I don't bring things to meetings, though.  I've always felt too rude, but I've wanted to!

Q.  What's the most unusual thing I've crocheted?

A.  I don't think I've made anything weird, though now I want to!  My husband jokes about crochet underwear, but I don't think I'll do it.  Then again, Christmas is coming!

Q.  What is my favorite thing to make and how often do I make it?

A.  For food, probably pizza.  I make it sometimes weekly but at least a couple times a month.  For crafts, blankets and granny squares and often blankets made of granny squares.  I'm usually working on a granny square.

So, there you have it, your questions answered.  I hope to see you all come back here even after the blog challenge ends next week.  It's been great having people to interact with on a regular basis.  Before this I think a few friends and my mom were the only readers!  While I appreciate their readership wholeheartedly, it's been so great to branch out!!


You might also like:
Finding Joy in What You Do
Autumn Blessing
The Ultimate Blog Challenge Facebook Page


Monday, October 23, 2017

Any Questions?


I've been participating the the Ultimate Blog Challenge this BLOGtober.  Can you believe it's been 23 days?  I know it's flown by for me!  Up until now I haven't used any of the prompts sent in the daily emails to all the challenge participants.  Mostly it's because I was trying to keep to the fall theme I set for myself.  But this one seemed too good to pass up.  Paul Taubman, one of the people who runs the challenge, suggested we ask our readers if they had any questions!  Great idea.  Thank you, Paul!

And thank you for stopping by and reading my blog!  It's been fun putting it together over the years and I appreciate readers, new and old.  So, do you have any questions?  Do you want to know more about me, my blog, crochet, cooking?  Do you have a fall themed question?  Do you want to ask something totally unrelated to the blog?  It's up to you!  Go ahead, ask anything!

Write your questions in the comment section below and I'll pick a few to answer tomorrow!


Oh, and here are some pumpkins to keep with the fall theme.  I couldn't resist!


You might also like:
10 Fun Facts About Me
What I Love About Fall


Sunday, October 22, 2017

Fall Menu - What We Ate This Week


Sunday - Spaghetti and Meatballs at a friend's house

Monday - canned soup and grilled cheese

Tuesday - Taco Soup - This one was a find from my 30 Days 30 Recipes Challenge.  My husband daughter and I love it.  I've made it several times since the challenge with only one difference.  To reduce the heat, I sub in black beans where the recipe calls for chili beans.  It's just perfect that way!

Wednesday - Pork loin, brown rice, broccoli salad.  This broccoli salad wasn't from the challenge, but it was a Weight Watchers recipe I found in one the books I got at the thrift store.  I'll share the recipe another time.  It's delicious and the calories are kept to a minimum.

Thursday - leftovers

Friday - Tacos made with ground turkey, hard shells, salsa, sour cream, cheese and lettuce

Saturday - pasta, meat sauce


Taco Soup


Saturday, October 21, 2017

Fall Haul


This is a shopping haul from my recent trip to Michaels.  With skeins of yarn at $2 and a 20% everything including sale items, this was one major deal.  $16 for 10 skeins of yarn!!  And this isn't old yarn from a dusty thrift store.  This is brand new!

Now I have to think of what to make.  Any ideas?  I'm sure I could whip up a few more granny squares.  Those are fun.  And there are so many things to do with granny squares. I could make another scarf or a blanket or maybe I could try something new altogether.


I would like to make the Halloween Garland I mentioned in my 14 Awesome Autumn Pins post.  I would need to use some orange and green from my stash, but I could use the black and white for the ghosts and spiders.

The white, blue and pink would be perfect for the Owl Mug Cozies I pinned.  The original poster did not use those colors, but I think they would work out great.

What do you think I should make?  Comment below for ideas.  Also, do you have a favorite yarn?  Comment below with the yarn you love.

As a reminder, I'm participating in the Ultimate Blog Challenge!


*UPDATE - I previously said $16 for 20 skeins of yarn.  I meant 10!  That would have been a crazy deal, though!

You might also like:
14 Awesome Autumn Pins
Cute Handbag for Little Girls
Watermelon Granny Stripe Afghan


Friday, October 20, 2017

Honey Turmeric Face Mask


I know as the days get cooler and the humidity leaves the air, my skin cries out for moisture.  To keep my skin healthy, I use a honey turmeric mask 3-4 times per week.  From research and experience, I have found honey to be a great way to restore moisture to my skin.  Combine it with some turmeric and you have a beauty powerhouse.

Honey contains polyphenols, powerful antioxidants that help to keep skin healthy.  It is also a humectant, making it perfect for restoring facial moisture that is lost by the dry indoor air.  In addition to these great benefits, honey, specifically raw honey, is scientifically shown to be antibacterial.  Check out this article on PubMed.  Unrelated but significant, some honeys have been shown to fight MRSA, also known as medically resistant staph.  This is good stuff!

Turmeric works its own magic for the skin. It is anti-inflammatory (some say more potent than ibuprofen) and is said to help reduce scarring.  I've even read that turmeric helps to fight cancer.  Honey shares this claim.

So, now that you know all the benefits, you need the recipe!

It's so easy.  Like stupid easy.


Honey Turmeric Face Mask

Ingredients:

1-2 tablespoons honey
1-2 tablespoons turmeric

Mix honey and turmeric until it becomes a paste.  Place in a water tight container.

To use:  Spread on face and let sit for a short time.  Wash off thoroughly.

Tip!  Use this in the shower.  Turmeric stains and makes a bit of a mess.  Just make sure you rinse your face well or you might look a little yellow.

As a reminder, I'm participating in the Ultimate Blog Challenge this month!  


You might also like:
My Number One Must Have Beauty Product
DIY deodorant
Buy It Make It Maybe

Thursday, October 19, 2017

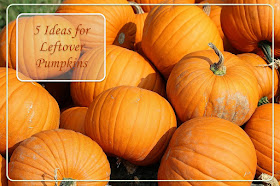
5 Ideas For Leftover Pumpkins


What do you do when Halloween is over and you have a lonely pumpkin rotting on your doorstep?  Here are 5 ideas of what to do with your leftover pumpkins before they turn to mush.


5 Ideas For Leftover Pumpkins

1.  Toss your pumpkins in the compost pile.  Just be aware you might have another pumpkin growing next spring!  I've also read you can bury your pumpkin to fortify the soil.  Has anyone tried this?

2.  If the pumpkin still looks good and hasn't rotted yet, bring it in the house and cook it up.  You can bake it in the oven, cut side down, at 300 degrees for about an hour or until soft.  Some people add a little water on the bottom of the pan to keep things moist, but this is not required.  Once it's cooked, you can scoop out the insides to use in recipes like pumpkin bread or pumpkin pie!  And if I haven't said it enough before, these two recipes are to die for!  So, so good.

3.  Another thing to do if your pumpkin is in decent shape is scoop out the seeds and toast them up.  Click here for a recipe!  Pumpkin seeds are a great source of zinc and magnesium.

4.  Donate them to a local pig farm.  We have one near me that takes pumpkins for their pigs.  What a treat for them!

5.  I haven't tried this one yet, but I went to a wedding where the pumpkins stood in as vases.  The insides were scooped out and filled with beautiful fall blooms.  My favorites were the multicolred sunflowers.  I may have to try this one!

Do you have any other ideas for what to do with those leftover pumpkins?  Let me know in the comment section below.  And remember I'm participating in the Ultimate Blog Challenge!


Wednesday, October 18, 2017

Fun-to-make Turkey Treats!


Last year, not long before Thanksgiving, my kids got together with their good friends and created some delicious treats.  The turkey cupcakes we had made a version of in a previous year, but the turkey cookies were a new idea altogether.  I found the idea for the cookies in a magazine.


We started with the cupcakes, as I knew those would be the easiest to construct.  The kids all got a previously baked cupcake, their choice of vanilla or chocolate frosting, candy corns and Wilton candy eyes.  We all shared a tube of red gel frosting.

The cupcakes needed little explanation.  I just showed them an example and they easily put the turkeys together.

Each cupcake came out a little different, but I'm sure the kids would tell you they were equally delicious!

Turkey Cupcakes

Ingredients:

1 box cake mix of choice plus ingredients called for on box
1 can chocolate frosting 
candy corn
Wilton candy eyes (found at Walmart or on Amazon)
1 tube red gel icing or homemade frosting colored with red food coloring

Bake cupcakes according to package directions.  Cool completely.  Frost with chocolate frosting.  Decorate according to picture above and enjoy!

If you have a kid who loves to bake, boxed cake mixes are a great place to start them off with following directions.  If you want to make it quick and easy, you can have the cupcakes prepared ahead of time.


After they had made their cupcakes, the cookies took more explanation and help.  Once I showed them how to make one, though, they caught on.  With a little frosting and some perseverance, the cookies turned out great.  Funny thing is, they lasted only a few minutes.  The kids ate up their work right after it was done!  At least I got pictures!


Turkey Cookies

Ingredients:

1 package store-bought chocolate chip cookies
1 can chocolate or vanilla frosting
1 bag Hershey's Kisses
1 bag Reese's peanut butter cup miniatures
1 bag candy corn
1 tube red gel frosting
1 tube orange gel frosting

For each turkey cookie you will need two store-bought chocolate chip cookies.  Cut a small piece off one so that it has a flat edge.  Place the uncut cookie on a plate.  Frost the cut edge of the cookie you just cut and affix it to the uncut cookie so that it looks like a chair.

Next take a miniature Reese's peanut butter cup.  Open it and cut off part of the side as shown in the picture.  Frost the front and cut edge of the peanut butter cup, turn it around and affix it to the cookies.  Then take a Hershey's Kiss and frost the back.  Stick it to the upright cookie.

Now, gather 14 candy corns.  With a knife spread some frosting on the tips of the candy corn and affix 12 in a semi-circle around the upright cookie.  These are your tail feathers.  Then take two and attach them, as shown, to the side of the peanut butter cup.  These are the wings.

Then you will stick on the eyes to the Hershey's Kiss with some frosting.  After you have done that, pipe on the red gobble, orange beak and turkey legs.

Now you have a cute and delicious treat!


*For either of these recipes you can substitute homemade ingredients.  You can use homemade cookies for the turkey cookies.  You can also use homemade cupcakes or frosting.  It's totally up to you!


You might also like:
The Best Moist Bread Stuffing
Swedish Apple Pie
Thanksgiving on a Budget