Pages

Saturday, October 31, 2015

Jack-O-Lantern Candle Jars

From Alexas_Fotos
Can you believe it?  Halloween is here already?  It seems like time just slips through my fingers.  Am I the only one who feels like time goes faster the older I get?

That being said, fall is one of my favorite seasons.  It's a great time to get outside and enjoy the crisp air and just take it all in.  I know winter is just a blink away, and I want to enjoy the outdoor time as much as possible.

In the fall I love to cook, bake and craft.  Here is one of the crafts I've done in the past.  I got the idea from Pinterest.  It's very easy and maybe it will inspire you!

Painted Jack-O-Lantern Jars

This crafts is simply made using old spaghetti sauce jars and acrylic paint.  

You can sketch a design with a permanent marker, but I just freehand-painted right onto the jar and lid. When they were dry I added a tea light candle for a cute effect.  I'm happy with how they turned out.  


These can really be adapted for any season.  They're also great for kids.  Let your imagination guide you!


You might also like:


Thursday, October 29, 2015

Leftover Pumpkins?


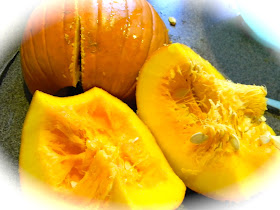
It's nearing the end of October and you've been thinking about all the pumpkins you have out in your front yard.  They've been providing great decoration so far, but you wonder what you'll do once Halloween has come and gone.  Don't let all that delicious goodness go to waste.  Like I showed you last week, one thing you can do is toast your seeds.  Today you I will show you how to bake your pumpkin.


Quarter your pumpkin.  I have the best luck using a made-for-kids pumpkin carving knife.  It's not sharp, but it cuts pumpkins and squash better than any utensil I've tried.  Then take a spoon and scoop out the guts.  Be sure to save the seeds for toasted pumpkin seeds!


Lay your pumpkins cut-side down on a large baking sheet then cover loosely with foil.


Bake pumpkins at 350 degrees for 1-1/2 hours, or until they are golden and are easily pierced with a fork.


You can see the color has changed and the flesh is easily scooped out.


Any pumpkin can be baked, but the best for baking are small pie pumpkins.  The ones shown here are from Breezy Gardens, a local farm.  They are, by far, the best I've tasted in a long time.  The flesh was smooth and creamy and though I made to use in recipes such as Pumpkin Bread, I ate some of it alone as a side dish with butter and salt.  Delicious!


Baked Pumpkin
Great for using in recipes instead of canned, though it may be less dense depending on your pumpkin variety.  

Ingredient:

pumpkin

Preheat oven to 350.  Cut pumpkin into manageable pieces.  Place cut-side down on a baking sheet.  Cover with foil and bake 1 hour.  Check with fork.  If fork does not go in easily or pumpkin does not seem tender, bake at 10 minute intervals until the right consistency is achieved.


You might also like:

Sunday, October 25, 2015

Autumn Blessing


Each fall I think of taking a trip to the White Mountains in New Hampshire to look at the foliage.  Then I stop for a moment and realize I have the beauty of the season already surrounding me.


The smell of the leaves, the bright oranges, reds and yellows.  I only need to step outside my door to enjoy what's already here.


Just a few days ago I took this picture of our tree. Today it sits bare.  It's amazing how quickly the changes take place.


Some green still shines through, though after a few frosts, it will be wilted and bare.


What feels like a nuisance when it's time to clean, is our next generation of soil.  


Not to mention, leaves are a whole lot of fun for my kids.  They revel in making giant jumping piles.


There is beauty in the change, the knowledge that in a blink white will blanket the land where now abides a vibrant canvas of color.  This is the blessing of Autumn.


Thursday, October 22, 2015

Toasted Pumpkin Seeds


Pumpkins are good for far more than just decoration.  It's only in modernity that we use things for a single purpose and then toss them.  Make use of this wonderful gift of nature and you'll wonder why you ever threw your pumpkins away.

Today I'll give you recipe on how to toast the seeds.  If you are carving a pumpkin don't let all of those tasty morsels go to waste.  Bake them up for a tasty treat.


Toasted Pumpkin Seeds

Ingredients:

Pumpkin seeds
salt or seasoned salt - my favorite seasoning is Goya Adobo

Preheat your oven to 350 degrees.  Rinse your seeds in a strainer being sure to remove any goop that might still be attached to the seeds.  Spread rinsed seeds on a baking sheet and salt.  Put in the oven and bake for 30 minutes.  Check the seeds and continue cooking at 5-10 minute intervals until your seeds are a nice golden brown.


Tuesday, October 20, 2015

Giant Granny Square Blanket


I love receiving handmade gifts from people who care about me!  Each time I use the gift, I think of the person who gave it to me.  My friend, Annie, gave my husband and I a giant granny square blanket for Christmas a few years back.  It keeps us nice and warm on cool fall nights.


The simple granny square is a classic crochet pattern at which even the novice crocheter can excel.  Yet, for it's ease, it is a beautiful project.  The blanket that I made here is a take on this classic.  It's a version with three double crochet stitches in the spaces, followed by two chains.  Some people make the granny with only one chain between shells, or even none.  It's entirely up to you.  The more chains, the looser and lacier the look of the afghan.


A close up of the single crochet edging.  Row one is in the cafe late followed by one row of green.


Classic Giant Granny Square Afghan

Materials:

3 jumbo-sized skeins of yarn (you will have some extra but not too much)
size I hook
needle to weave ends

Shell -three double crochets together in one space

1.  Begin by chaining four.  Put your hook in the furthest chain from the hook and slip stitch.  Pull to make a circle.

2.  Chain 2.  Double crochet two into the space.  Chain two.  Double crochet 3, chain two.  Repeat this two more times.  Once you have four groups of three double crochet chain two, slip stitch to connect.  Slip stitch to the corner.  

3.  Chain 2.  Double crochet two, chain one, then double crochet three.  Chain two and make two shells in each corner followed by chain two.  Slip stitch to join and slip stitch to corner.

4.  Continue pattern with two shells in each corner separated by chain one, and one shell in each chain two space, separated by chain two.


This is a throw-sized blanket measuring approximately 53" X 53"

Here's a great YouTube tutorial if you would like to see a visual.  Videos like this one are how I taught myself to crochet a few short years ago.  Her pattern is a tiny bit different, but really, you could follow her and end up with a blanket basically the same as mine.


Sunday, October 18, 2015

Changing Seasons


Just outside the laundry room window there is a big maple tree.  It must have been there for a hundred years.  It may be there when I die.  When I gaze upon this beauty of nature, I am reminded how quickly time moves on.  I think of the subtle daily changes leading to the ever larger change of the seasons.  These things happen bit by bit each day until I realize summer is gone and fall has arrived.  This beautiful maple reminds me of the cycle of which we are all part.


Thursday, October 15, 2015

Lazy Applesauce


In addition to all the other wonderful apple recipes I've already posted, there is one more we can't forget, Lazy Applesauce.  This applesauce simply combines apples and water and, if you like, a teaspoon of cinnamon.

Lazy Applesauce

Ingredients:

Apples 8-10 depending on size - for best flavor profile, use a variety of sweet and tart apples
1/4-1/3 cup water
1 teaspoon cinnamon - optional

Peel, core and cut apples into chunks and place in crockpot.  Add 1/4-1/3 cup water, depending on how thick you want your applesauce.  Set crockpot to low and leave for two hours.  After two hours, mash with a potato masher.  Return to crockpot for 4-5 more hours.  Mash with potato masher for chunky applesauce.  Mix with immersion blender for a smoother consistency.  Add one teaspoon of cinnamon and mix completely.


Chunks of apples in crockpot


Mashing apples after two hours


Mixing with immersion blender after 6-7 hours


The final product, yum!


I call it Lazy Applesauce because you simply need to mix the apples once they are cooked.  Many applesauce recipes call for cooking the whole apple and using a food mill at the end.  Though this recipe does waste a little apple by peeling and coring at the start, for me, it's way less effort and far easier cleanup….which means I'll actually make it!

If you are not home, don't worry about mashing the apples at the two hour mark.  The applesauce just might take closer to 7 versus 6 hours.

Hint:  If you use only tart apples, you might need sugar.  If you use only sweet, the flavor may be lacking.  Use a variety for the best flavor profile.

Nutrition Information:
Serves 8
1 serving =
95 Calories
0 grams Fat
25 grams Carb
5 grams Fiber
1 gram Protein

Calculated at CalorieCount.com

Weight Watchers Points Plus - 0
Weight Watchers POINTS - 1

You might also like:
Swedish Apple Pie
Dried Apples
Apple Bread

Tuesday, October 13, 2015

Easy Fall Wreath


I was in a creative mood last Saturday so I dug through my craft room for some inspiration.  I found some grapevine wreaths and fall flowers in a two separate drawers.  The wheels began to turn and this wreath is the result.


This post is more inspirational than instructional.  My simple wreath was made from wiring together two thin grapevine wreaths from Dollar Tree.  Then silk flowers and faux berries were added with the help of wire and hot glue.


As you can see, this wreath is quite thin.  This is why I wired two together in order to achieve a substantial base for my flowers.

Easy Fall Wreath 

Materials:

Two thin grapevine wreaths - mine were from Dollar Tree
Fall flowers and berries
Hot glue and glue gun
Craft Wire
Wire cutters

To make the wreath, first place one thin grapevine wreath on top of another.  Then wrap wire around them both, pulling it tight and continuing in a circle until both wreaths are secured.  Don't cut the wire as you will use this to help attach the flowers.

Once the two wreaths are bound together, insert fall flowers into the spaces of the grapevine wreath, winding wire around the stems of the the flowers and berries as you go.  Be sure to trim long stems before you insert them to insure a beautiful, full wreath.  If you want a flower to lay a specific way, hot glue it in place.

Flower wreaths really are free-form art.  There is no right or wrong, it just depends how you like it!

Thursday, October 8, 2015

Recipe - Dried Apples

Image from Pippalunacy


Are you looking for another way to use up the bounty from your recent apple picking adventure?  One great idea is to make dried apples?  They are a simple and delicious, all-natural snack.  Dried apples can be made in the oven on low heat or in a food dehydrator.  Because gadgets are so much fun, I use the dehydrator method.  My husband bought me a Nesco food dehydrator for my birthday several years ago and even though it sits in a closet for a good amount of the year, when I do use it, I'm so glad I have it.  Besides dried apples, I've used it to make fruit leathers, dried herbs, and "sun dried" tomatoes.

In the future I plan on posting recipes for all of the above, but today here's a very simple recipe for dried apples.

Dried Apples

Ingredients:

apples - I prefer tart apples such as Macs or Cortlands, but sweet apples work just as well.
cinnamon - optional

Cut apples into wedges or rings about one quarter inch thick.  You may choose between peeling your apples or leaving the skin on.

Place fruit on food dehydrator trays.  If using cinnamon, sprinkle lightly over the apples.  Turn on machine and check after a few hours.  If the apples are not sufficiently dry, replace the cover and dry for another hour.  Check again.  When apples are dry but bendable, remove them and place them in a sealed container.  Even if all the apples are not at exactly the same stage, putting them in a closed container will "proof" them, getting them all to the same consistency.  If you're unsure, check the apples the next day to make sure they are dry enough.

Apples can be dried for even more time if you prefer a chip.  These are also delicious.

When dried properly, the apples will keep for months in a sealed glass or plastic container.  No need to refrigerate.

Image by GutandTasty


Here's my food dehydrator.  Like all dehydrators, it's a little bulky, so I keep it in a closet when I'm not using it.  My dehydrator from Klem's cost around $40, but it can also be purchased on Amazon for a similar price.


You might also like:
Swedish Apple Pie
Brookfield Orchards                           
Apple Bread

Saturday, October 3, 2015

Recipe - Swedish Apple Pie


Ok, so technically this recipe from my mom is called Swedish apple pie.  I call it, "I'm Too Lazy to Roll a Crust Apple Pie".  With heaps of apples and simple ingredients like butter, sugar and flour, how can you not love this delicious combination?  It is so good!


Apples peeled, sliced and ready to be sprinkled with cinnamon and sugar.  These tart Paula Reds brown quickly, but no worries, they are still delicious!


Thursday, October 1, 2015

Boyish Stripes - Double Crochet Blanket


This blanket is another of the ones I like to make because of how it looks and how quick it is to make.  It's a double crochet stitch using two strands of yarn as one.  It has a coffee brown border on each of the sides.  


It turned out very nice, I think.  Typically I don't border a blanket like this, but it seemed this one needed it.  When I finished it, I was glad I added the border.


Boyish Stripes - Double Crochet Blanket

Materials: